How to Repair a Long-Framed Veneer Deck in an Antique Canoe
February 27, 2018
by Mike Elliott, Kettle River Canoes
email: artisan@canoeshop.ca
Note: If you happen to be a master cabinet-maker who repairs Chippendale furniture for fun, this project will be pretty straightforward. For the rest of us, it is a supreme challenge. Many of my adventures in repairing fancy canoes employ a trial-and error methodology. In this project, I used the error-and-error method. As I take you through the process, I describe some of the pitfalls I encountered. I hope this helps you avoid some of them.
***********************
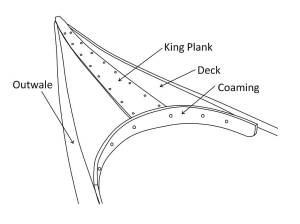
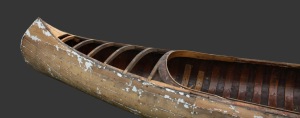
Long decks are found in both wood-canvas canoes and all-wood canoes. They are comprised of a number of components. Most often, the deck itself is two pieces butted together down the centre-line. The king plank covers this joint while the coaming covers the end grain of the deck and king plank.
These decks were made in one of two ways. The first method, already described in a previous blog article, is to pre-bend solid wood for the deck to fit the graceful curves in the ends of the canoe.
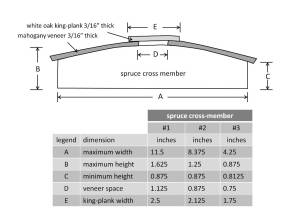
The second method is to build a frame at each end and cover it with thin veneers (usually two pieces of mahogany). The king plank covers the joint between the deck veneers while the coaming covers the frame as well as the end-grain of the deck veneers and king plank.
Some companies built the frame directly into the structure of the canoe and installed the veneers afterwards.
I repaired the stern deck in a 1948 Willits Brothers canoe. In their shop, they installed the framed deck after it was fully assembled.
The first step is to remove the deck from the canoe. Start by removing the coaming. It is held in place with six #8 brass flat-head wood screws. Set it aside to be re-installed near the end of the repair process.
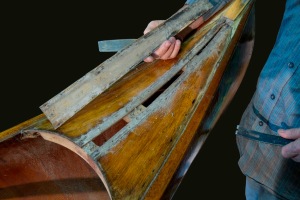
The king plank is attached with ¾” (19 mm) 18-gauge brass escutcheon pins. They are dubbed (bent over) at the back of the deck. Ease them out by working a putty knife between the king plank and the deck. Then, wedge a small pry bar between the putty knife and the deck.
Working gently along the length of the king plank, gradually work it free from the deck as the brass pins straighten.
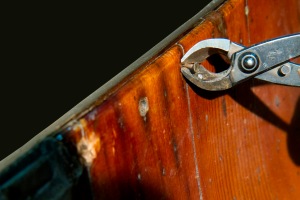
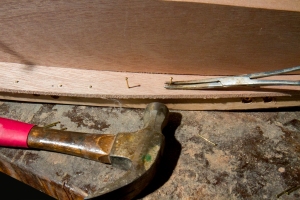
The deck veneers are attached with ¾” (19 mm) #6 brass flat-head wood screws (under the king plank) and ¾” (19 mm) 18-gauge brass escutcheon pins driven into the white oak deck frame along the outer edge. Use the same method to lift the veneers off the frame. Some of the brass pins will probably pull through the veneer and remain in the oak frame. Remove them with a pair of bonsai concave cutters.
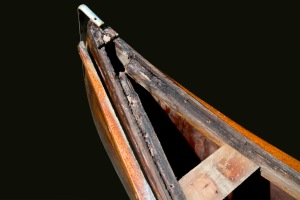
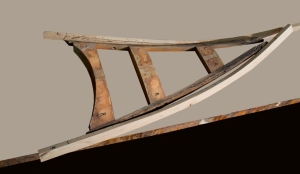
With the frame exposed, it is clear that the white oak side rails in this frame are rotted at the ends.
The outwales are attached to the deck by means of several #8 brass flat-head wood screws. Remove them to expose the hull. The main body of the outwales are attached to the hull from the inside with ¾” (19 mm) 16-gauge copper canoe nails. Remove a few of these with a pair of bonsai concave cutters to provide full access to the canoe hull in the region where the frame is attached to the hull.
Clamp a pair of vice grips to a hack saw blade to create a strong handle. Work the blade between the deck frame and the hull of the canoe to cut through a number of ¾” (19 mm) 16-gauge copper canoe nails used to attach the frame to the canoe.
Remove the frame from the canoe.
The side rails of the frame are white oak while the cross members are spruce. This particular frame requires new side rails.
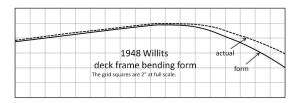
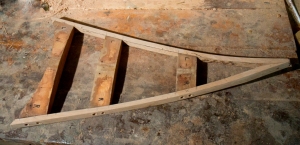
New white oak stock is cut wide enough to create both rails from a single piece once it is bent to the correct shape. A bending form is created that is 3″ (76 mm) wide.
The oak stock is soaked for three days, steamed for 60 minutes and bent onto the form without a backing strip. Let the wood dry for a week.
Once removed from the bending form, saw the new stock into two pieces on the table saw and cut to rough dimensions. The left and right frame rails are mirror images of each other. Be sure to label them to avoid errors further on in the process. Line up the new pieces with the original rails and mark them out for later fitting.
Remove the original rail on one side and install the new piece.
Align a straight edge down the centre-line of the frame and mark the end of the new piece.
Use a dovetail saw or Japanese crosscut saw to cut just outside the line.
Remove the original rail on the other side. Dry-fit the new piece and mark the angle for the end of the frame. Cut on the outside of the line, dry-fit the new piece and make adjustments until the rails fit together properly at the end. Install the second rail and secure them together at the end with a ¾” 16-gauge bronze ring nail.
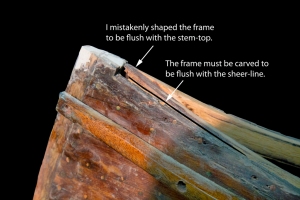
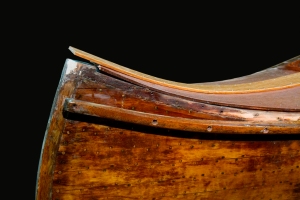
Dry-fit the deck frame in the canoe and hold it in place with several spring clamps. Trim the end to fit and carve the final shape of the side rails until they are flush with the sheer-line of the canoe. This step is critical to the final fit of the deck. In a solid-wood deck, the shape can be fine-tuned after it is installed. In a veneer deck, the frame must be shaped precisely before anything else is done.
I found this out the hard way. The first time I dry-fit the frame, I shaped the end to be flush with the stem-top. This was about 3/16″ (5 mm) higher than the sheer-line of the hull.
When I went to install the finished deck, the assembled end rose above the stem-top and did not fit properly. I had no choice but to take the entire thing apart and carve the frame to be flush with the sheer-line.
The Willits brothers book-matched their veneers for the decks. They re-sawed a 4/4 (1″ or 25 mm thick) board on a band saw and opened the pieces like a book. The veneers were planed to 3/16″ (5 mm) thick.
Use a mahogany board 7″ (18 cm) wide and 36″ (91 cm) long. Once the boards are re-sawn and planed, use the original veneers as templates. Mark out oversized pieces and cut them to rough shape. Be sure to cut well outside the lines. You want to have lots of room for fitting and trimming to final size.
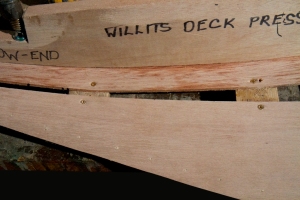
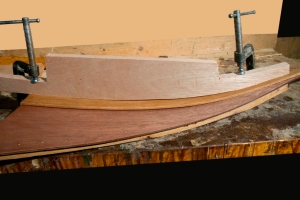
Make a veneer press jig with 4/4 hardwood.
Soak the veneers for at least four hours. Take one of them and pour boiling water over it. Press the veneer into place and use the veneer jig (locked in place with a couple of C-clamps) to act as another pair of hands while you secure the veneer with fasteners. Be sure the veneer extends at least 1″ (25 mm) past the outside edge of the frame.
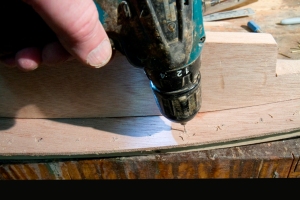
Drill pilot holes in the spruce cross members #2 and #3.
Attach the veneer with ¾” (19 mm) #6 bronze flat-head wood screws close to the edge nearest the centre-line.
Reposition the veneer jig to allow full access to the outer edge of the deck. Drill pilot holes through the veneer and into the frame rail at 1½” (38 mm) intervals.
Use a small, flat-head tack hammer to drive ¾” (19 mm) 18-gauge brass escutcheon pins into the veneer. I started with my regular canoe tack hammer which has a large, domed face. I switched over to the small, flat-faced hammer after mis-hitting several pins and bending them. The Willits brothers countersunk these pins and filled the holes with wood putty. I opted to skip this step after my counter-sink slipped and split the veneer (not once, not twice, but three times before I tore off the veneer and started again). This process offers no end of challenges, the least of which being the fact that the drill bit is 3/64″ (1.2 mm) diameter and the holes are drilled free-hand. If you are anything like me, you will need at least one more drill bit than you have on-hand (I used six drill bits to attach six veneers and two king planks).
If your fingers are as big and clumsy as mine, use a pair of forceps to hold the pin while you hammer.
Once the veneers are attached, dry-fit the deck. Mark the end of the veneer so the deck fits back into its original position. Trim the ends of the veneer and dry-fit the deck again. If you have done everything right so far, the top of the veneer will be flush with the stem-top.
Mark the outside edge of the canoe hull on the underside of the veneer. Remove the deck and carefully shape the veneer to just outside the line. Repeat the process of dry-fitting, marking and shaping until the veneer fits precisely.
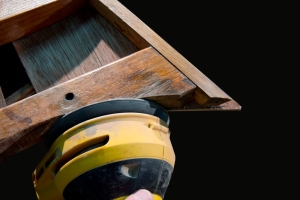
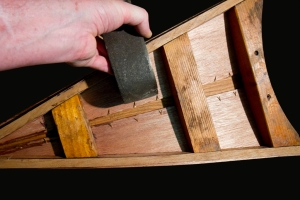
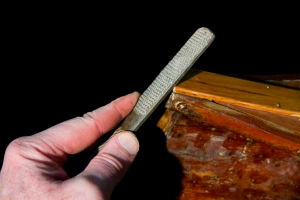
Use a random-orbital sander to shape the end-grain veneer until the coaming fits precisely. This too, is a slow process of shaping and dry-fitting the coaming in small, careful steps. The veneer is extremely delicate and prone to breaking (especially at the corners). I switched to a fine rasp as I got closer to the final fit.
Sand the veneer by hand from 120-grit to 220-grit. Wet the veneer surface and let it dry. This will raise the grain. Sand by hand from 320-grit to 600-grit. Use a tack cloth to remove lingering dust once the sanding is complete.
Stain the veneer to match the original wood in the canoe.
Prepare a piece of white oak for the king plank. Sand it to 600-grit and stain the wood to match the original. Seal all of the frame components with shellac (2-pound cut using lacquer thinner instead of methyl hydrate). Then apply a coat of spar varnish (thinned 12% with paint thinner). Allow the varnish to dry for a couple of days before proceeding to the next step. Press the king plank into place and use the veneer jig to hold it in place while you secure it with escutcheon pins.
Drill pilot holes and hammer escutcheon pins at 2″ (50 mm) intervals.
Use a clinching iron to dub the pins at the back of the deck.
Dry-fit the deck in the canoe. If you have done everything right so far, the king plank sits snugly on top of the stem-end.
Attach the coaming to the deck with ¾” (19 mm) #6 bronze flat-head wood screws.
Install the completed deck and secure it with ¾” (19 mm) 16-gauge copper canoe nails.
Re-attach the outwales with #8 bronze flat-head wood screws. Spray the screws with a little WD-40 to reduce heat build-up as they are driven in. Hot screws are more likely to break off as they are driven tight.
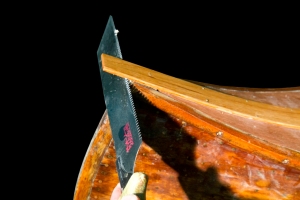
Use a Japanese cross-cut saw to trim the king plank flush with the outer edge of the stem.
Smooth the corners of the king plank at the end with a rasp.
All’s well that ends well.
